
Configuring OpenID Connect with a Microsoft Azure tenant
This guide describes the steps necessary to use a Microsoft Azure tenant as an Identity Provider for S-Filer Portal. You need an account with sufficient permissions to add a new Enterprise Application.
Step 1 - Connect to the Azure portal
- Log in to the Azure portal using your browser and your login credentials
- If you have multiple tenants, make sure you are in the right tenant
Step 2 - Create a new "Enterprise Application"
- Use the search bar in the Azure Portal to find the Enterprise Applications service
- Once in the Enterprise Applications screen, use the New application button in the top bar to create a new application

Step 3 - Create your own application
- Register an application to integrate with Microsoft Entra ID (App you're developing)
- When the new page is presented, click on the Create your own application button
- Enter a name identifying the S-Filer Portal application
- Check the option Register an application to integrate with Microsoft Entra ID (App you're developing)
- Click on Create

Step 4 - Register your own application
- The Register an application page will then be presented
- Leave the name already filled in (it's the same as the enterprise application name)
- Check the desired option for the parameter Supported account types according to your organization's needs
- Click on Register

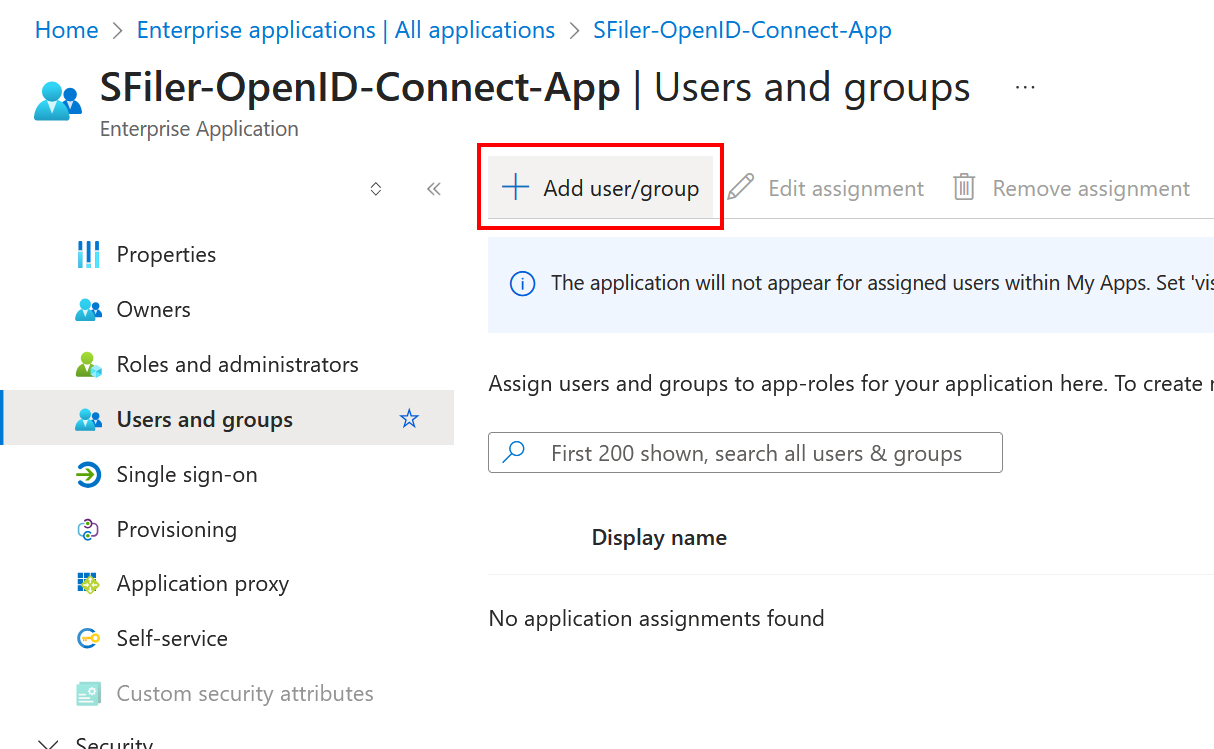
Step 5 - Assigning users
- Return to the list of applications and click on the one you just created.
- Expand the Manage option in the left-hand navigation menu.
- Click on the Users and groups tab, then on Add user/group.
- This screen allows you to specify the users and/or groups that will be able to authenticate with OpenID.
- Be sure to add at least one user so that you can log in once the configuration is complete.
Step 6 - Find the S-Filer Portal application
- In the search box at the top of the screen, enter
App registrations - Choose this service from the drop-down menu

- Select the All applications tab
- In the service search box, enter
SFiler-OpenID-Connect-App- Use the name you chose when creating the application
- Select the newly created application from the list

- On the application main page, copy the value of the Application (client) ID field
- This value corresponds to the Client identifier in step 3 of the S-Filer Portal configuration

Step 7 - Metadata URL retrieval
- Click on the Endpoints button at the top of the application's main page
- In the box that opens, copy the value of the OpenID Connect metadata document field
- This value corresponds to the Metadata URL in step 3 of the S-Filer Portal configuration

Step 8 - Authentication configuration
- Expand the Manage option in the left-hand navigation menu.
- Click on Authentication
- Click Add a platform
- Click Web

- Enter the domain name of S-Filer Portal followed by
/sfiler/LoginOpenIdConnectCallback.actionas the "redirect URI"- Ex:
https://[YOUR.SFILER-DOMAIN.COM]/sfiler/LoginOpenIdConnectCallback.action - This URL comes from the environment on which S-Filer Portal is running. It should be a public URL that is accessible to users who want to use the OpenID Connect functionality.
- Ex:
- Under Implicit grant and hybrid flows, check the ID Tokens option (used for implicit and hybrid flows).
- Click on Configure

Step 9 - Creating a secret
- Still in the left-hand navigation menu, click on Certificates & secrets.
- Go to the Client secrets tab
- Click on New client secret

- In the box that opens, enter
SFileras the Description (actually any name can be used here as long as it helps you recognize that this secret is used by S-Filer Portal) - In Expires, select the expiration period for the client secret, we recommend keeping the recommended value
- Click on Add
WARNING
Everytime the client secret expires, it will need to be manually renewed in this console and re-entered in S-Filer. This should be considered when selecting the expiration period.

- Copy the value of the secret
- This is the Client secret in step 3 of the S-Filer Portal configuration

Next steps
- Configure S-Filer Portal with these information S-Filer Portal OpenID Connect Configuration